On January 2018, Veeam publicly announced the release of Veeam PN (powered network) version 1, a lightweight SDN appliance that was released completely FREE to use. And while Veeam PN was released as part of a greater solution focused on extending network Availability for Microsoft Azure, Veeam PN can also be deployed as a standalone tool via a downloadable OVA. Veeam PN has some key standalone use cases we’ll explore in this blog series.
While testing the tool through it’s early dev cycles, it was clear there was an opportunity to allow access with home labs and other home devices, all without having to setup and configure relatively complex VPN or remote access solutions.
There are plenty of existing solutions that do what Veeam PN can, however, the biggest difference with comparing the VPN functionality with other VPN solutions, is that Veeam PN is purpose-built and easy-to-use, and setup is only within a couple clicks. Veeam PN’s underlying technology is built on OpenVPN, so that in itself provides users with a certain level of familiarity and trust. The other great thing about leveraging OpenVPN is that any Windows, MacOS or Linux client will work with the configuration files generated for point-to-site connectivity.
Home lab remote connectivity overview
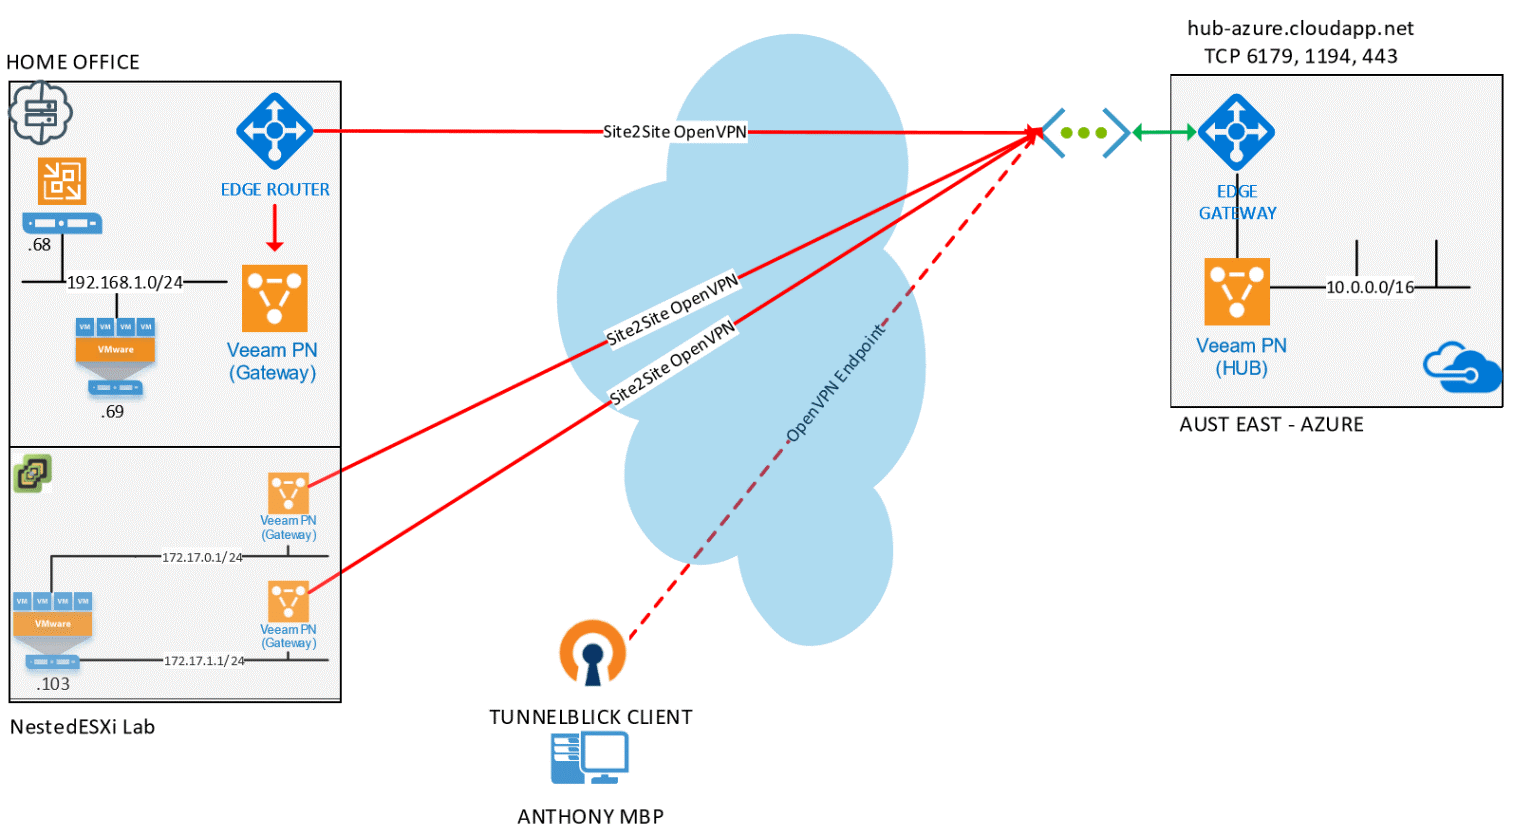
While on the road, users need to easily access home lab/office machines. In my own case, I’m on the road quite a bit and need access without having to rely on published services externally via my entry-level Belkin router, I also didn’t have a static IP which always proved problematic for remote services while on the road. At home, I run a desktop that acts as my primary Windows workstation which also has VMware Workstation installed. I then have my SuperMicro 5028D-TNT4 server that has ESXi installed and runs my nested ESXi lab. I need access to at least RDP into that Windows workstation, but also get access to the management vCenter, SuperMicro IPMI and other systems running on the 192.168.1.0/24 subnet.
In the above diagram, you can see I also wanted to directly access workloads in the nested ESXi environment, specifically on the 172.17.0.1/24 and 172.17.1.1/24 networks. With the use of the Tunnelblick OpenVPN Client on my MBP, I am able to create a point-to-site connection to the Veeam PN Hub which is in turn connected via site-to-site to each of the subnets I want to connect into.
Deploying and configuring Veeam PN
As mentioned above, to get stared, you will need to download the Veeam PN OVA from Veeam.com. This Veeam KB describes where to get the OVA and how to deploy and configure the appliance for first use. If you don’t have a DHCP enabled subnet to deploy the appliance into, you can configure the network as a static by accessing the VM console, logging in with the default credentials and modifying the/etc/networking/interface file.
Components:
- Veeam PN Hub Appliance x 1
- Veeam PN Site Gateway x number of sites/subnets required
- OpenVPN Client
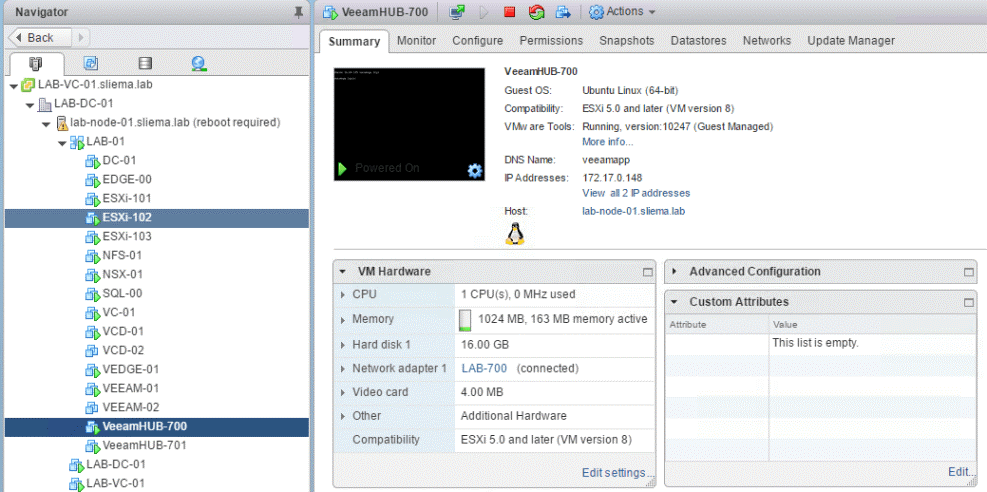
The OVA is 1.5 GB, and when deployed, the virtual machine has the base specifications of 1 vCPU, 1 GB of vRAM and a 16 GB of storage, which if thin provisioned, consumes just over 5 GB initially.
Networking requirements:
- Veeam PN Hub Appliance – Incoming Ports TCP/UDP 1194, 6179 and TCP 443
- Veeam PN Site Gateway – Outgoing access to at least TCP/UDP 1194
- OpenVPN Client – Outgoing access to at least TCP/UDP 6179
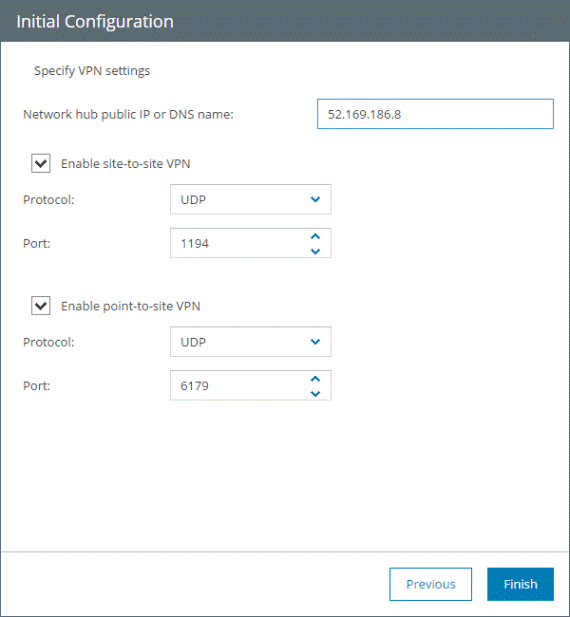
Note that as part of the initial configuration, you can configure the site-to-site and point-to-site protocol and ports which is handy if you are deploying into a locked-down environment and want to have Veeam PN listen on different port numbers.
In my setup, the Veeam PN Hub Appliance has been deployed into Azure, mainly because that’s where I was able to test out the product initially, and in theory it provides a centralized, highly available location for all the site-to-site connections to terminate into. This central hub can be deployed anywhere and as long as it’s got HTTPS connectivity configured correctly, you can access the web interface and start to configure your site and standalone clients.
Configuring site clients (site-to-site)
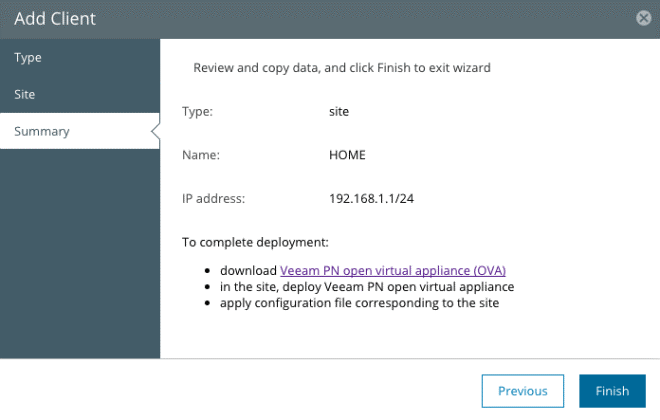
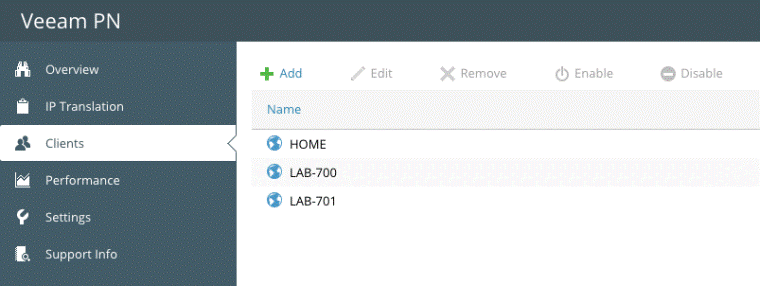
To complete the configuration of the Veeam PN Site Gateway, you need to register the sites from the Veeam PN Hub Appliance. When you register a client, Veeam PN generates a configuration file that contains VPN connection settings for the client. You must use the configuration file (downloadable as an XML) to set up the Site Gateways. Referencing the diagram at the beginning of the post, I needed to register three separate client configurations as shown below.
Once this was completed, I deployed three Veeam PN Site Gateways on my home office infrastructure as shown in the diagram — one for each site or subnet I wanted to have extended through the central hub. I deployed one to my Windows VMware Workstation instance on the 192.168.1.0/24 subnet and, as shown below, I deployed two Site Gateways into my nested ESXi lab on the 172.17.0.0/24 and 172.17.0.1/24 subnets respectively.
From there I imported the site configuration file into each corresponding Site Gateway that was generated from the central Hub Appliance and in as little as three clicks on each one, all three networks where joined using site-to-site connectivity to the central hub.
Configuring remote clients (point-to-site)
To be able to connect into my home office and home lab when on the road, the final step is to register a standalone client from the central Hub Appliance. Again, because Veeam PN is leveraging OpenVPN, what we are producing here is an OVPN configuration file that has all the details required to create the point-to-site connection — noting that there isn’t any requirement to enter in a username and password as Veeam PN is authenticating using SSL authentication.
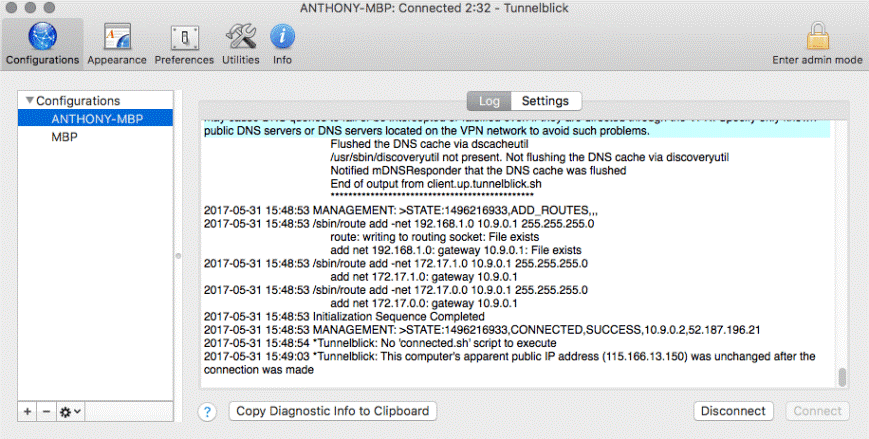
For my MBP, I’m using the Tunnelblick OpenVPN Client. I’ve found it to be an excellent client, but it obviously being OpenVPN, there are a bunch of other clients for pretty much any platform you might be running. Once I imported the OVPN configuration file into the client, I was able to authenticate against the Hub Appliance endpoint as the site-to-site routing was injected into the network settings.
You can see above that the 192.168.1.0, 172.17.0.0 and 172.17.0.1 static routes have been added and set to use the tunnel interfaces default gateway which is on the central Hub Appliance. This means that from my MBP, I can now get to any device on any of those three subnets no matter where I am in the world — in this case I can RDP to my Windows workstation, connect to vCenter or ssh into my ESXi hosts.
Conclusion
To summarize, here are the steps that were taken in order to setup and configure the extension of a home office network using Veeam PN through its site-to-site connectivity feature to allow access to systems and services via a point-to-site VPN:
- Deploy and configure Veeam PN Hub Appliance
- Register sites
- Register endpoints
- Deploy and configure Veeam PN Site Gateway
- Setup endpoint and connect to Hub Appliance
Those five steps can take less than 15 minutes, which also takes into consideration the OVA deployments as well. This is a very streamlined, efficient process compared to other processes, which can take hours and would involve a more complex set of commands and configuration steps. The simplicity of the solution is what makes it very useful for home lab users wanting a quick and easy way to access their systems. It just works!
Again, Veeam PN is completely FREE, and downloadable in OVA format. And this use case I described, I have been using it without issues for a number of months, and it adds to the flexibility of the Veeam PN solution.
The post Simplified remote access for home labs and offices with Veeam PN appeared first on Veeam Software Official Blog.
